The main parts shipment arrived just a day before from Air Power Incorporated in Arlington, Texas. It came Fed Ex ground and was about 200 lbs. Shipping costs were $270.00, wish I had thought of Fed Ex. It included the new cylinders, camshaft, tappets and other parts and bearings.
The boxes were waiting to be opened. Seems like $16,000 worth of parts should look a lot bigger.
The crankcase, crankshaft, oil sump and and assorted other parts and fasteners where back from NDT (non-destructive testing), cleaning and polishing (Avian Aeronautics). The case had been sent out to another shop for lap and line boring (ECI) to make sure all of the mating surfaces where within tolerances and precise. The fuel system had been sent to a shop in Florida (Av Star Fuel Systems) for a rebuild (cardboard box). The connecting rods went to a shop in Colorado for refurbishment and balancing (the goal was to be equal or less than 4 grams discrepancy in weight between all of the connecting rods).
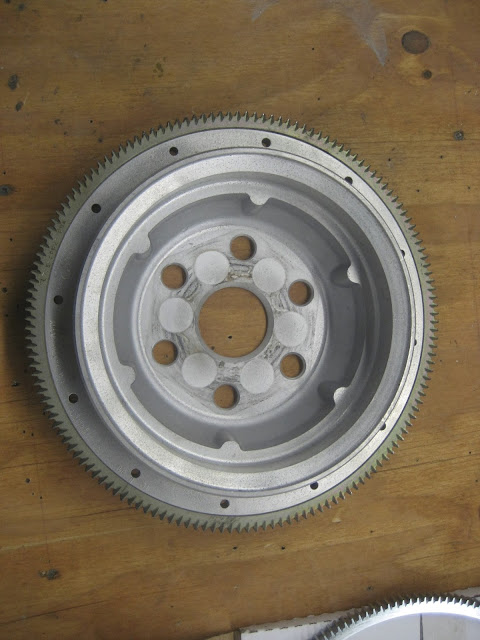
The first project was to replace the ring gear on the flywheel as the teeth had worn where the starter gear would initially engage the ring gear. Engines tend to stop in a similar position and to start again from that position unless the prop is turned.
The wear on the teeth was apparent. I always tend to turn the prop to a horizontal position after stopping the engine. After seeing this wear, it seems like the way to limit it would be to turn the prop to a different position every time before starting. That is going to be part of my preflight from this point forward.
The ring gear was cut just short of completely through so as not to damage the flywheel. It's tough
stuff.
A chisel and hammer was used to split the ring the rest of the way.
You need a good chisel and heavy vise with aluminum angles in the jaws to safely hold the flywheel.
The old and new ring gears.
To get them back together, the flywheel was put into a freezer and the new ring gear heated. The differential contraction and expansion allowed the gear to be pressed onto the flywheel.
This got the gear on about 60%, the rest was done in the vise.
The fit needed to be complete and precise. Close inspection of the fit showed a few gaps that required a little more pressure in the vise. The aluminum angles prevented damaging the aluminum flywheel by the steel vise.
Successful installation.
The flywheel was then masked for painting. All of the exposed bare aluminum surfaces would be painted with an enamel paint to lessen future corrosion. All surfaces were wiped down with lacquer thinner before going into the paint booth.
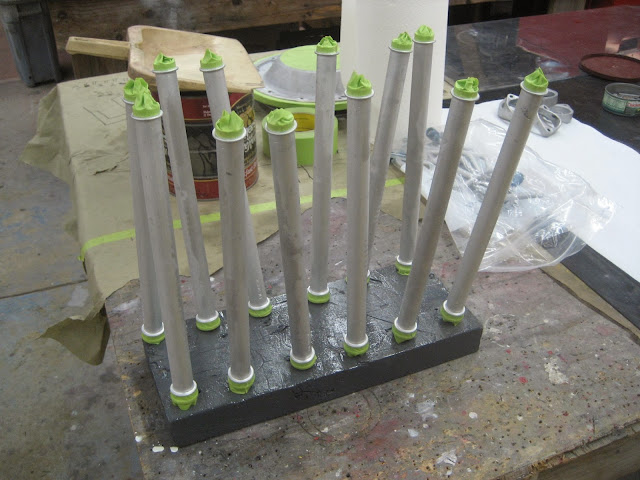
The push rods tubes were also prepared for painting.
The paint from Randolph Paints was called Lycoming gray. Eventually there would be a second coat.
Here was a close up look at the hydraulic tappet bodies that rode against the camshaft lobe that was worn the most. These were both linkages to the intake valves on cylinders 3 and 4, and interfaced with a single lobe on the camshaft. The surface of the tappet failed first, then wore the camshaft lobe. Once the nitrided surface was broken, the erosion of the metal accelerated. This was primarily what I was finding in the oil filter.
Here was a comparison of the two most worn tappets and another that wasn't quite as far along. You could see how that the surface was just about ready to break through by the circular pattern in the metal surface.
Here was the hydraulic tappet body and the hydraulic plunger assembly separated.
This showed the position that they functioned in. The plunger transferred force from the camshaft through a socket that fit on the end of the push rod. That connected with the rocker arm which changed the direction of the force approximately 180 degrees and opened the valve.
Here I was going through all of the parts in the shipment and checking them against the packing list. This was a new tappet body and below were the new hydraulic plungers.
I found one set of bearings missing from the shipment even though it had been marked as packed. Just like doing a preflight before flying, never totally trust anything. As we went through more boxes later on we found several other missing parts and relied on overnight shipping (at the suppliers expense) to keep us on our timeline.
Vernatherm valve.
Connecting rod.
Nitrided Lycoming cylinder.
Cylinder.
Piston, piston pin, rings and gaskets.
Push rods and sockets.
Camshaft.
Many of the bolts, nuts and accessory parts were sent out to be cleaned and cadmium plated which slows corrosion. Tim had a great system of using muffin pans to organize and count all the fasteners that was simple and effective.
Everything was labelled and would be crosschecked against the Lycoming engine assembly manual.
New gaskets and seals. The remachined crankshaft was in the plastic bag.
The first assembly was the oil pump.
Safety wired through castellated nuts. Tim's skill level with something as basic as safety wire twisting has always be impressive to me. It is attention to details like this that makes for an excellent quality and safest engine.
We did find one problem when we started looking at the case. It had come back from lapping and line boring and was wrapped in a plastic bag. Somewhere along the line somehow it had been dropped and there was some minor damage to the case and two bent studs.
After a little careful smoothing, replacement of two studs and checking for any cracking with dye around the studs we were satisfied that there was no significant damage other than being a little (or maybe a lot) irritated and we continued on.


No comments:
Post a Comment